Month: January 2013

Turquoise and Coral Living Room Makeover

Spring Living Room Makeover1

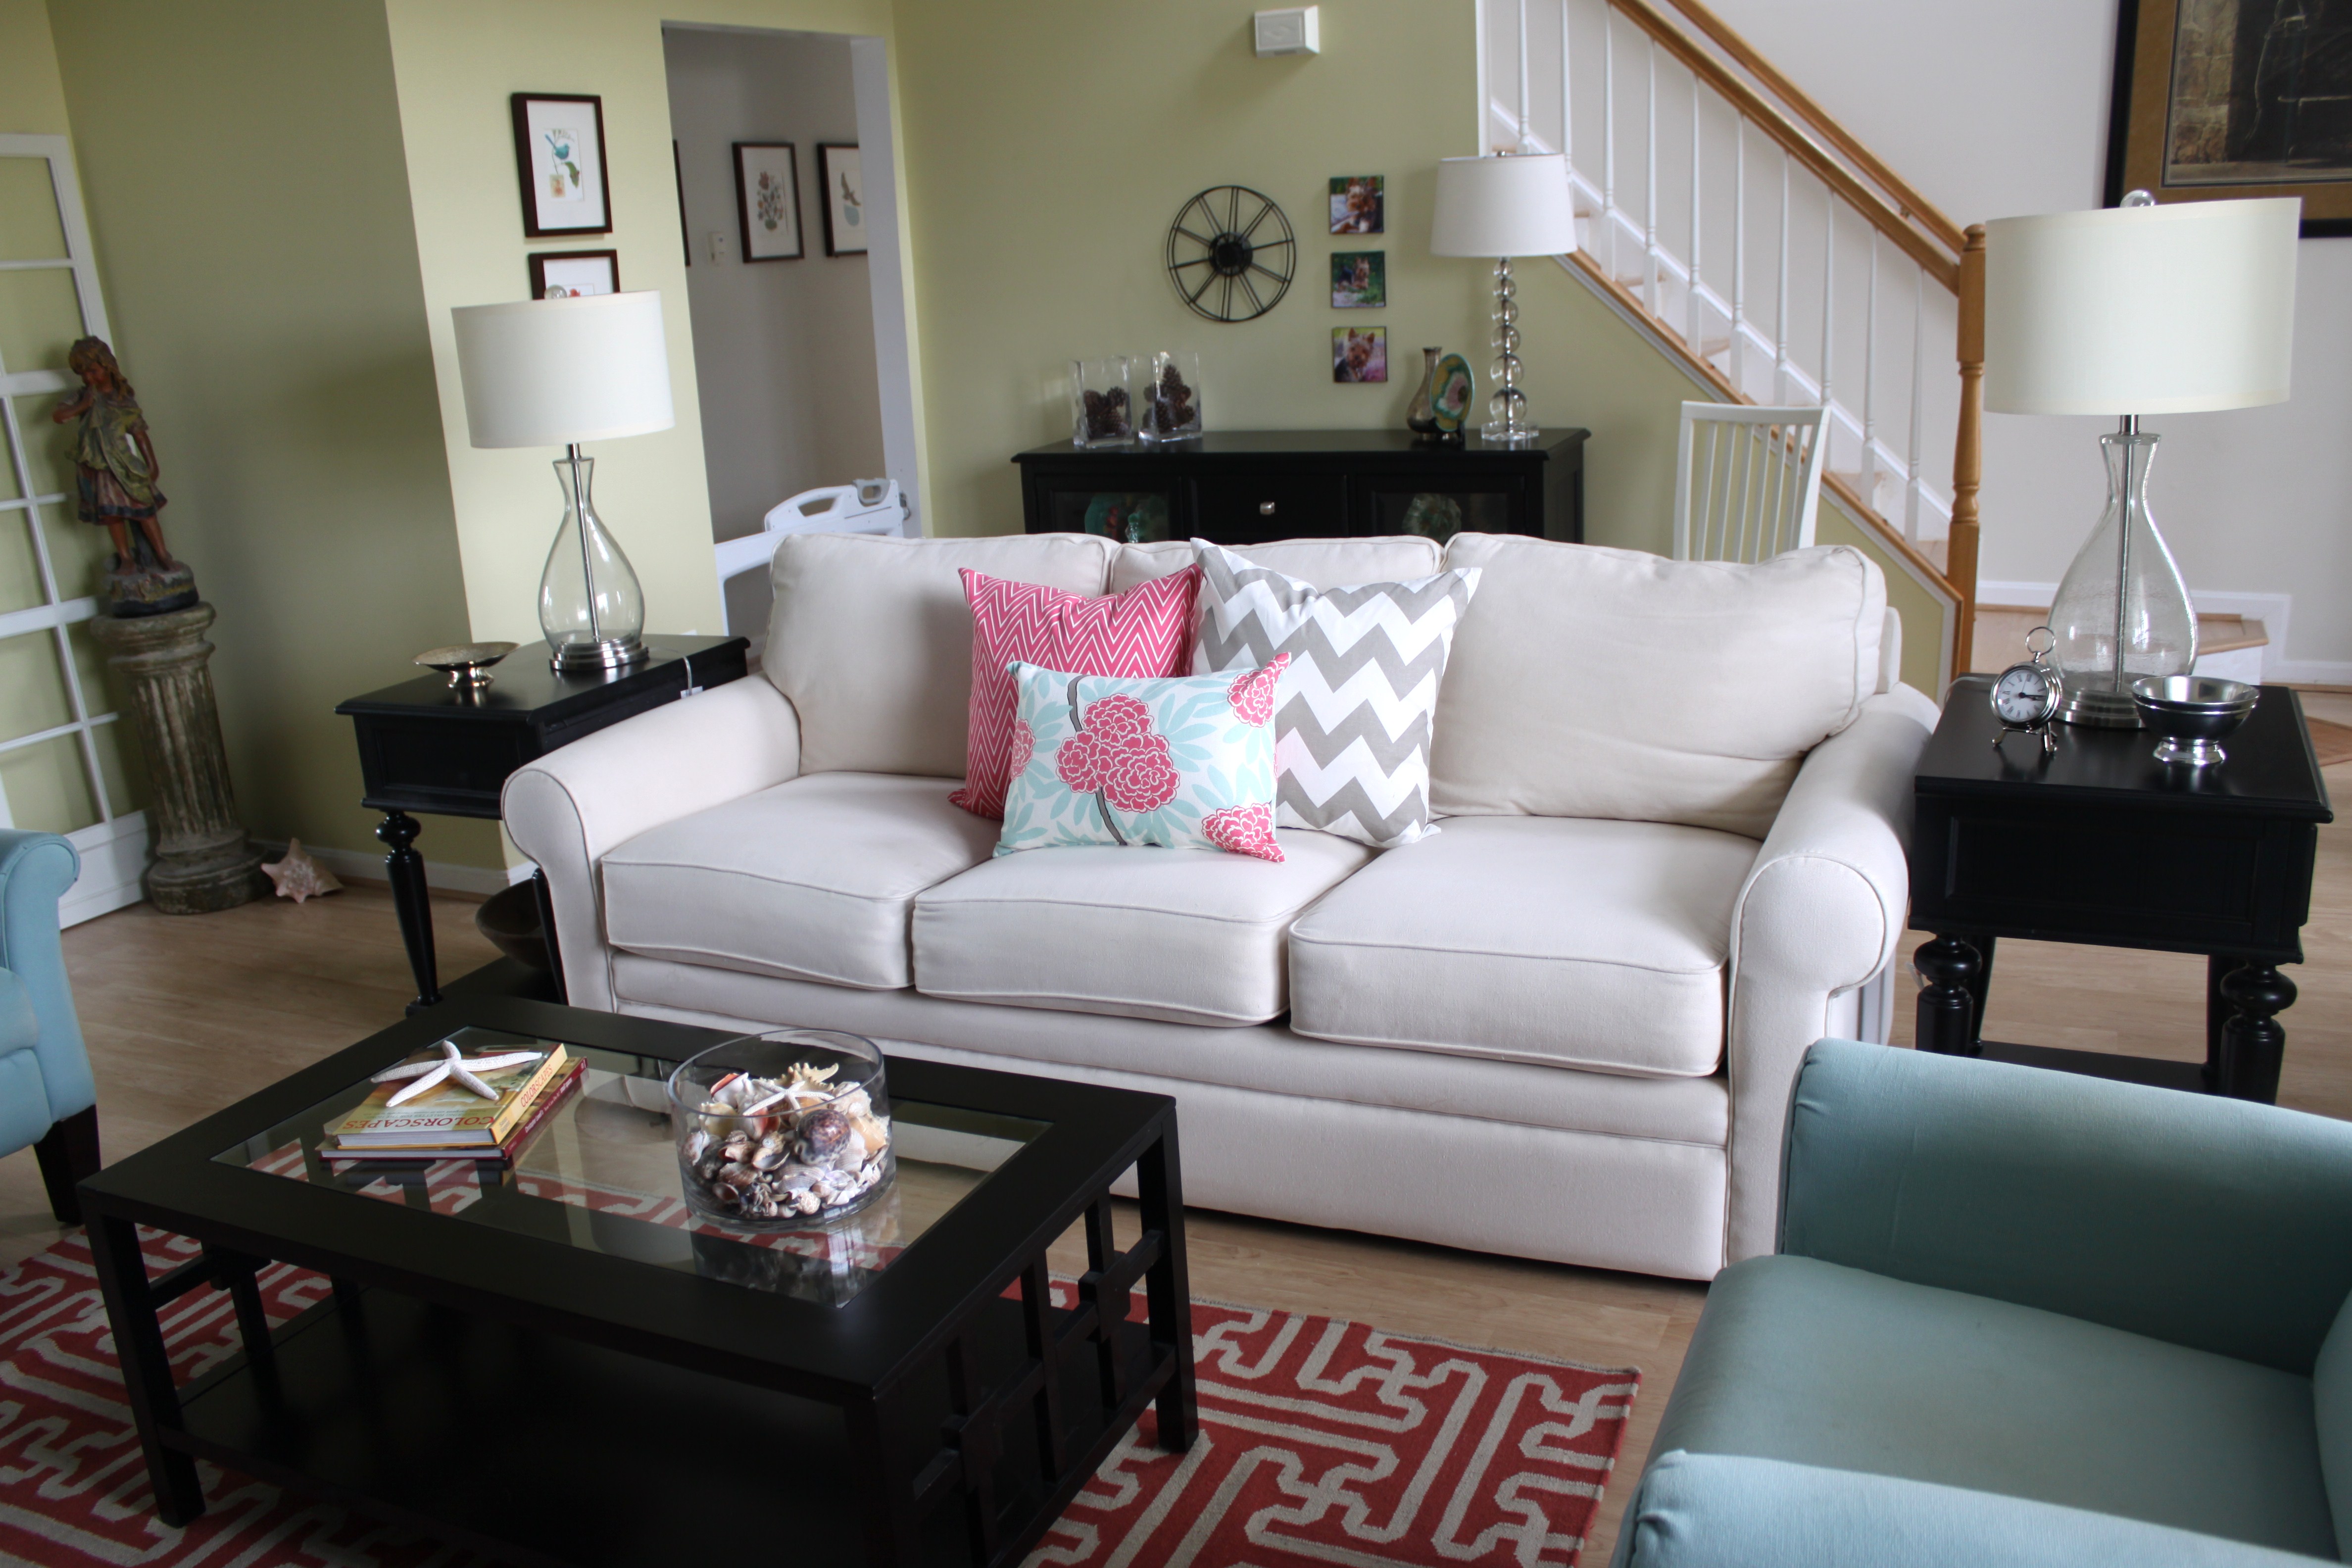
I was sorting through photos tonight and came across these shots I took of my living room last spring. I’ve always been a fan of turquoise but when I added coral into the mix, this room really came to life.

Spring Living Room Makeover1c

I couldn’t resist these pretty pillow covers by Caitlin Wilson. You can purchase them at Caitlin Wilson Textiles.

Spring Living Room Makeover3

The bookcases and end tables came from American Drew Furniture. The pretty aqua recliners and couch came from La-Z-Boy Furniture Gallery. Who knew La-Z-Boy recliners could look this good? They’ve come a long way since the sloppy, unattractive (but comfortable) chairs of my youth. The coral Suraya Archive floor cloth came from RugsUSA. The black and white curtains came from Pottery Barn, my absolute favorite place to shop.

Spring Living Room Makeover7

Little Stevie likes to help me accessorize the room during photo shoots.

Steve on the Coffee Table

Stevie can do things that my big dogs can’t do, like hang out on the coffee table. I keep shooing him off, but you can see how well that’s going….

Steve2

Steve on high alert. Is that a squirrel? Must. Get. Him.

Skillet Steak and Corn

Skillet Steak and Corn

When I’m short on time I often reach for this recipe for skillet steak and corn. It’s delicious, easy to prepare, and uses ingredients that are readily available in my pantry. I found the original recipe in Taste of Home magazine, but I’ve made a few changes over the years. Here are the ingredients you’ll need to make skillet steak and corn:

1 lb. skirt steak cut into strips
1 medium onion, cut into wedges
2-3 garlic cloves, minced
1/2 teaspoon dried thyme leaves
2 tablespoons oil
1 cup beef broth
1/3 cup red wine (I used merlot)
1 can (14 oz.) diced tomatoes
1 can (15 oz.) whole kernel corn, drained
Hot cooked rice

In a skillet brown the steak, onions, garlic, and thyme in oil. Add the beef broth and wine; simmer for 10 minutes, or until the liquid has evaporated. Stir in tomatoes; cover and simmer for 15 minutes longer. Add corn; heat through. Serve over hot cooked rice.

Mushroom Fairy in Watercolor

Mushroom Fairy2

This little mushroom fairy proved to be more time consuming than I’d anticipated, but I’m pleased with the results. I’ve been working on this painting since last weekend and was beginning to think that I wouldn’t complete it before the week was done. This painting is based on a tutorial in Linda Ravenscroft’s book, “How to Draw and Paint Fairies.”

Here’s a close up view of her face.

Mushroom Fairy3

Sweet and Sour Chicken and Fried Rice

Sweet and Sour Chicken with Fried Rice

I found these recipes for sweet and sour chicken and vegetable fried rice on Pinterest yesterday, and they looked so good that I had to try them. My daughter loves Chinese food, and the end results were so delicious that I scored lots of mom points with this dinner. I nearly asked her if I was “momtastic or momtacular.”

I tried two Pinterest recipes this weekend; one was a bomb so I was hesitant to try these recipes. I must say that the cooking process–dipping the chicken bits into cornstarch and then beaten egg and pan frying it was time consuming and created big messes on my counter tops, stove, and fingers. So some process improvement was in order. Halfway through the dipping process, while I was complaining about my messy counters and sticky fingers my daughter came up with a brilliant idea: just combine the cornstarch and eggs, stir it into a paste, and then pour it over the chicken. No more messy counters or hands, and it really sped up the preparation time.

This sweet and sour chicken is amazing but it’s loaded with sugar, salt, and fat. I reduced the garlic salt by half since there’s plenty of salt in the soy sauce, and didn’t miss it at all. I may substitute garlic powder for the garlic salt the next time I make this dish to further reduce the salt.

The vegetable fried rice was also delicious and a snap to prepare. No complaints here and no tweaking of the recipe was necessary. If you throw in some diced chicken, ham, or shrimp it would make a great main dish. With the process improvement now in place, this make-at-home sweet and sour chicken and vegetable fried rice are must tries. Here’s a close-up shot. Get the recipe here.

Sweet and Sour Chicken with Fried Rice2

Moon Goddess in Watercolor

Moon Goddess1

My daughter worked on this painting off and on over the last few weeks and finally finished it last night. She got a bit frustrated because she had to darken the background several times to create the glowing moon effect, but I think it was well worth the effort. I like the texture in the background and the way she incorporated the background colors–purple and blue–into the maiden’s hair.

This painting was based on a tutorial in Stephanie Pui-Mon Law’s book, “Dreamscapes Myth & Magic: Creating Legendary Creatures and Characters in Watercolor.”

How to Make a McCafe Frappuccino at Home

Make-at-Home McCafe Frappuccino1

In November I shared my recipe for how to make a McDonald’s McCafe iced mocha at home. Yesterday, my daughter asked me to duplicate her favorite McCafe drink–a mocha frappucinno. She really loves this frozen drink, and I wanted to duplicate it as closely as possible, so I bought a McCafe mocha frapp to use as a taste comparison and got to work. It only took me one attempt, plus a few adjustments, to come up a recipe that tastes very close to the original.

The same ingredients are used to make both McCafe drinks, but the proportions and preparation are different. Here are the ingredients you’ll need to make a home-made McCafe mocha frappuccino:

Iced Mocha Ingredients

Ingredients:

1 tablespoon Starbucks Via iced coffee mix
3 tablespoons heavy whipping cream
3 tablespoons chocolate syrup
1 cup water
2 cups crushed ice
Canned whipped cream

Combine the Starbucks Via coffee mix, heavy whipping cream, chocolate syrup, water, and ice in a blender. Blend until slushy. Pour about one tablespoon of chocolate syrup in the bottom of the glass, add the frozen drink mixture, top with whipped cream, then drizzle with chocolate.

Now you can enjoy your favorite McCafe iced coffee treats from the comfort of your own home, plus it’s cheaper.

Winter Mice in Watercolor

Winter Mice1

I thought it was time to expand my horizons and paint subjects other than flowers and fairies so I gave these cute little winter mice a try. This painting is based on tutorials in Linda Ravenscroft’s book, “How to Draw and Paint Fairyland–A Step-by-Step Guide to Creating the World of Fairies. This comprehensive book not only shows readers how to paint fairies but also their environment and a host of other creatures–like these adorable mice. You don’t have to be a fan of fairies to benefit from the instructions in this book; there’s something for everyone wanting to improve their painting skills.

Easy Cranberry-Raisin Biscotti

Cranberry Biscotti1

There’s nothing I like more than stealing a few minutes of time for myself in the evening to relax, enjoy a cup of coffee or tea, and nibble on something sweet. And these cranberry-raisin biscotti are a real treat. The original recipe called only for cranberries but I added raisins for a touch more sweetness and a bit more chewiness. These biscuits are highly addictive so plan on making a double batch since they freeze well. I like to freeze them in individual bags of two cookies each; they make great grab-and-go treats and they thaw quickly.

Here are the ingredients you’ll need to make cranberry-raisin biscotti:

Cranberry Biscotti Ingredients1

Ingredients:

2 1/2 cups flour
1 teaspoon baking powder
1/2 teaspoon salt
1 1/2 cups sugar
1/2 cup butter
2 eggs, beaten
1/2 teaspoon almond extract
1 teaspoon vanilla extract
1/2 cup dried cranberries
1/2 cup raisins
1/2 cup chopped pecans
6 oz. white chocolate (optional)

Combine the flour, baking powder, and salt in a medium bowl; set aside. Beat the butter, eggs, and sugar in a large mixing bowl until creamy. Add the vanilla and almond extracts, dry ingredients, cranberries, raisins, and pecans. Mix until blended.

Divide the dough in half. Shape each piece into a 2 1/2″ x 9 1/2″ x 1″ high log. Place logs on a cookie sheet covered with wax or parchment paper. Bake at 350 degrees for 35 minutes or until golden brown. Cool completely. Transfer logs to a cutting board. Slice logs on the diagonal into 1/2″ wide slices. Arrange the slices, cut side down, on the cookie sheet. Bake at 350 degrees for 10 minutes. Turn biscotti and bake 5 minutes more or until slightly brown. Cool completely.

Optional: Melt the white chocolate and drizzle on top of the cookies (or dip if you prefer).

%d bloggers like this: